
Products
Admin Console
Self-hosted deployment supported
Admin Console
Centralized and flexible license management
Solutions
How to Set Up Your Calendar in Google Sheets (Free Template Attached)
With the free template attached, you'll be able to get started quickly, making adjustments as needed to fit your unique schedule.

Organizing your schedule can be a breeze with Google Sheets. By using a simple, customizable calendar template, you can keep track of important events, deadlines, and appointments—all in one place.


Key Sections
Here’s how the key sections for the PDF calendar template could be structured:
-
Calendar Title: Choose a clear and descriptive title for your calendar that reflects its purpose, such as "Work Schedule" or "Personal Planner."
-
Month and Year: Ensure the calendar includes a header with the current month and year so it’s easy to reference.
-
Days of the Week: The calendar should have a section that clearly labels each day of the week, starting from Sunday or Monday, depending on your preference.
-
Date Cells: Each day should have a corresponding date cell where you can add events, tasks, or important reminders. These can be left blank for customization.
-
Event Notes Section: An optional section at the bottom or side of the template where you can jot down extra notes, tasks, or goals related to the events on your calendar.
Step-by-step Guide on Working with a Calendar in Google Sheets
Here is step by step guide about how to set up your calendar in Google Sheets:
Step 1: Download the Free Template
First, download the attached Google Sheets calendar template. This template is designed to be easy to use, customizable, and ready to edit. Click the link provided or open the file directly from your Google Drive to access the template.
Step 2: Make a Copy of the Template
Once you’ve opened the template, go to File in the top-left corner, and select Make a copy. This will save a copy to your Google Drive, allowing you to edit it freely without affecting the original version.
Step 3: Adjust the Dates
Find the current month or any month you'd like to start with. You can manually change the dates by typing them into the cells, or simply use the built-in dropdown to select the correct month and year. The template should automatically adjust the dates for you.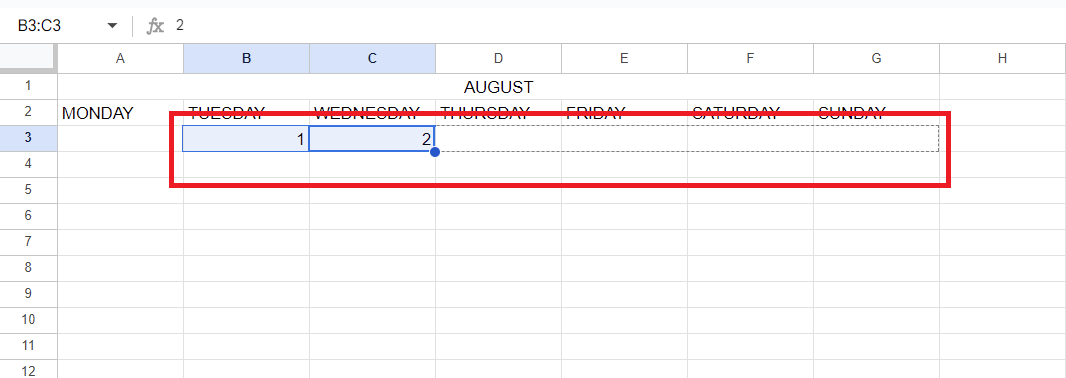
Step 4: Customize the Events Section
In each cell representing a day, you can add events, reminders, or appointments. Double-click on any date to type in your plans. For more details, you can create a list, add color coding, or even link specific events to other Google Sheets or documents.
Step 5: Format and Color Code Your Calendar
Google Sheets offers easy ways to customize the look of your calendar. Select the cells you want to format, then use the Fill Color tool to highlight important dates, meetings, or deadlines. This is especially useful if you want to visually prioritize certain tasks.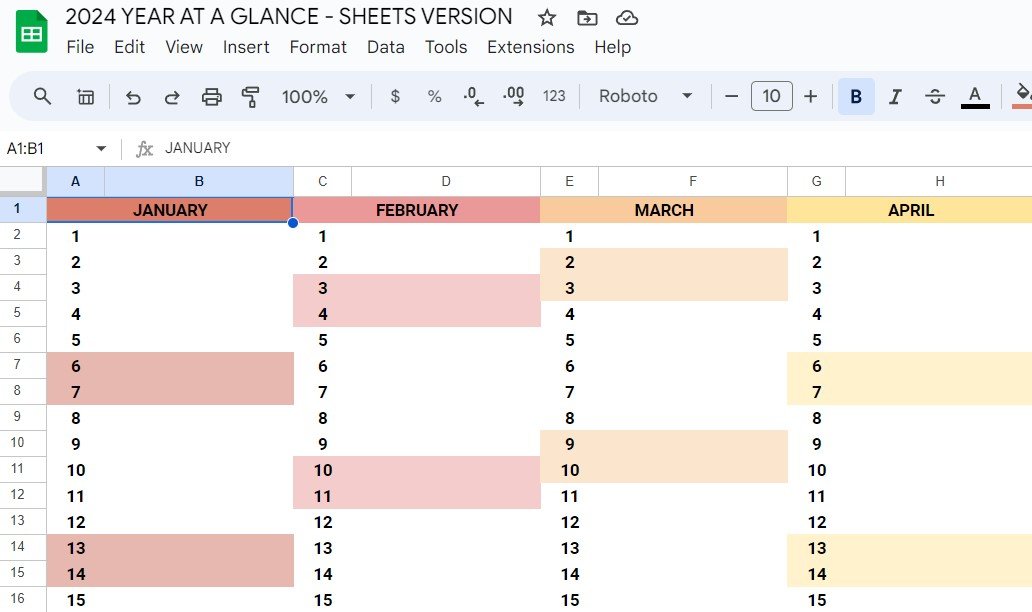
Step 6: Share with Others
Once your calendar is set up, you can share it with friends, family, or colleagues. To do this, click the Share button in the upper-right corner of Google Sheets, and add the email addresses of the people you want to collaborate with. Adjust permissions so they can view or edit the calendar as needed.
Step 7: Save and Reuse for Future Months
Since the template is reusable, you don’t need to start from scratch every month. Simply copy your current calendar to a new tab and adjust the dates as required. This allows you to maintain a continuous record of your schedule for easy reference.
"Whether you’re a busy professional, a student with a heavy course load, or just someone looking to bring a bit more order into their life, this method of keeping track of your days is a game-changer."
 Matthew Burleigh
Web Developer
Source: LinkedIn
Tips and Tricks for Writing a Calendar in Google Sheets
Here are some tips for how to set up your calendar in Google Sheets:
1. Use Conditional Formatting for Highlights
To make important dates or events stand out, use Conditional Formatting. Select the dates you want to highlight, go to Format > Conditional Formatting, and choose a color for specific criteria like birthdays, deadlines, or meetings. This makes your calendar visually easier to scan.
2. Create Dropdown Menus for Quick Entry
If you have recurring events or tasks, create a dropdown menu for quicker input. Go to Data > Data validation and set up a list of options (e.g., "Meeting," "Project Deadline," "Appointment"). This will help you fill in your calendar faster and maintain consistency.
3. Use the Freeze Feature to Keep Headers Visible
When you scroll through your calendar, it's easy to lose track of what day you're looking at. Use the Freeze feature to lock the top row (the days of the week). Simply go to View > Freeze and choose to freeze the top row. This keeps your days visible as you navigate through the sheet.
4. Add Hyperlinks for Event Details
For events that require more information, such as a meeting agenda or a project brief, you can insert hyperlinks directly into your calendar. Right-click the cell where you want to add the link, select Insert link, and paste the URL. This way, you can easily access additional resources without cluttering your calendar.
5. Sync with Google Calendar
If you prefer to integrate with Google Calendar, you can manually add important dates from your Google Sheets calendar or use add-ons to automate syncing. This helps you stay organized across both platforms without having to duplicate entries.
6. Use Filters to Focus on Specific Events
To focus on specific types of events, like deadlines or meetings, use the Filter function. Select the entire calendar, go to Data > Create a filter, and then choose the category you want to focus on. This helps you zoom in on particular types of events without being distracted by everything else.
7. Duplicate Tabs for Future Months
Instead of creating a new calendar from scratch every month, simply duplicate the current tab. Right-click the tab name and choose Duplicate. Then, adjust the month and year as needed. This saves you time and ensures consistency across months.
8. Add Color Coding for Different Categories
Assign different colors for various event types, such as personal, work-related, or social. Use the Fill Color tool to color-code events, making it easy to see at a glance which category an event belongs to.
9. Use Shortcuts for Faster Editing
Speed up your calendar creation by using Google Sheets shortcuts. For example, press Ctrl + D (Windows) or Command + D (Mac) to copy data from the cell above, or Ctrl + Enter to enter the same data in multiple cells at once. This can make entering dates or recurring events much quicker.
10. Set Reminders with Google Sheets Add-Ons
Install Google Sheets add-ons like "Add Reminders" to set up automatic email reminders for key dates or events. This keeps you on track even if you’re not actively checking your calendar.
Download a Calendar Template
We've walked through the essential steps to set up and customize your calendar in Google Sheets, from adjusting dates and adding events to using color coding and automation features. Using the provided template streamlines the process of creating and managing your schedule, making it easier to stay organized and efficient.


Whether you're tracking personal tasks or coordinating with a team, this template is a versatile tool that saves time and effort.
Fill Out and Customize the Template
Follow this step-by-step guide to fill in and customize your calendar in Google Sheets.
Calendar Title
What to Fill In:
- Choose a title that reflects the purpose of your calendar. For example, "Work Calendar," "Personal Planner," or "Project Timeline."
How to Fill It In:
- At the top of your Google Sheets calendar, replace the placeholder text with your chosen title.
Example:
- "Team Meeting Schedule"
Month and Year Section
What to Fill In:
- Specify the month and year for the calendar you're setting up. Adjust for each subsequent month if you are setting up multiple months at once.
How to Fill It In:
- Either select the correct month and year from the dropdown (if available), or manually type it in.
Example:
- "September 2024"
Days of the Week
What to Fill In:
- This section is typically pre-filled, but ensure that the days of the week (Monday-Sunday or Sunday-Saturday) fit your preference.
How to Fill It In:
- Double-check that the days are labeled correctly and adjust if needed. You can manually enter text if changes are required.
Example:
- "Monday, Tuesday, Wednesday, Thursday, Friday, Saturday, Sunday"
Date Cells
What to Fill In:
- Enter specific events, deadlines, or appointments for each date.
How to Fill It In:
- Click on any cell under a specific date and type the event name or reminder. Add additional details like time or location, if needed.
Example:
- "September 5: Team Meeting at 2 PM"
- "September 15: Project Deadline"
Event Notes
What to Fill In:
- Use this space to include additional notes or special instructions related to the events on your calendar.
How to Fill It In:
- Scroll to the bottom or side of your calendar and enter any notes, tasks, or reminders that apply to your events.
Example:
- "Reminder: Send agenda to the team by September 3."
- "Prepare presentation slides before September 12."
Customization (Optional)
What to Fill In:
- Add color codes, adjust font sizes, or apply formatting to differentiate between types of events (e.g., work vs. personal).
How to Fill It In:
- Use the Fill Color tool to highlight important dates, use bold for significant events, or add borders to create visual sections.
Example:
- Color-code deadlines in red, meetings in blue, and personal events in green.
"I can see the appeal: it's free, fully customizable, and you can share your Sheets calendar with anyone using a link."
 Dylan Reber
Writer and Editor
Source: LinkedIn
Common Mistakes to Avoid
Be aware of potential pitfalls and legal considerations is crucial. Here are some additional tips and common mistakes to avoid.
Legal Considerations:
When using a calendar in a professional setting, there are a few legal aspects you should be aware of:
Data Privacy:
- Be cautious when sharing calendars that include sensitive information, especially in a business environment. If your calendar includes confidential meeting details or personal data (like birthdays), ensure the permissions are set appropriately.
- Tip: Only share your calendar with relevant people and set it to “View Only” if necessary to avoid unauthorized edits.
Compliance with Company Policies:
- Many organizations have specific guidelines around data storage, including the use of third-party tools like Google Sheets. Make sure your calendar usage complies with company policies.
- Tip: Check with your IT or legal department if you are unsure whether using Google Sheets for scheduling is permitted.
Common Mistakes to Avoid:
Not Backing Up Your Calendar
- Mistake: Failing to back up your calendar could lead to data loss, especially if you’ve spent time customizing it.
- How to Avoid: Regularly download your calendar as an Excel or CSV file. Go to File > Download, and choose your preferred format.
Forgetting to Adjust for Time Zones
- Mistake: If you're scheduling meetings or events across different time zones, it's easy to overlook time differences.
- How to Avoid: Add a time zone column or use a world clock add-on to your Google Sheets. Double-check the event time for remote participants.
Overcrowding the Calendar
- Mistake: Jamming too many details into your calendar can make it difficult to read and maintain.
- How to Avoid: Keep the entries concise. Use a separate notes section for additional details, and consider using color-coding to quickly identify event types (work, personal, deadlines).
Not Utilizing Conditional Formatting
- Mistake: Manually formatting your calendar can lead to inconsistencies and increase the time spent managing it.
- How to Avoid: Use Google Sheets’ Conditional Formatting to automatically highlight important dates or events, like deadlines or high-priority meetings. This reduces human error and makes your calendar visually organized.
Inconsistent Data Entry
- Mistake: Inconsistent naming conventions (e.g., "Meeting with John" on one day and "John Meeting" on another) can lead to confusion.
- How to Avoid: Standardize how you enter recurring events or appointments. Use a dropdown list to make event entry consistent.
Download PDF Reader Pro
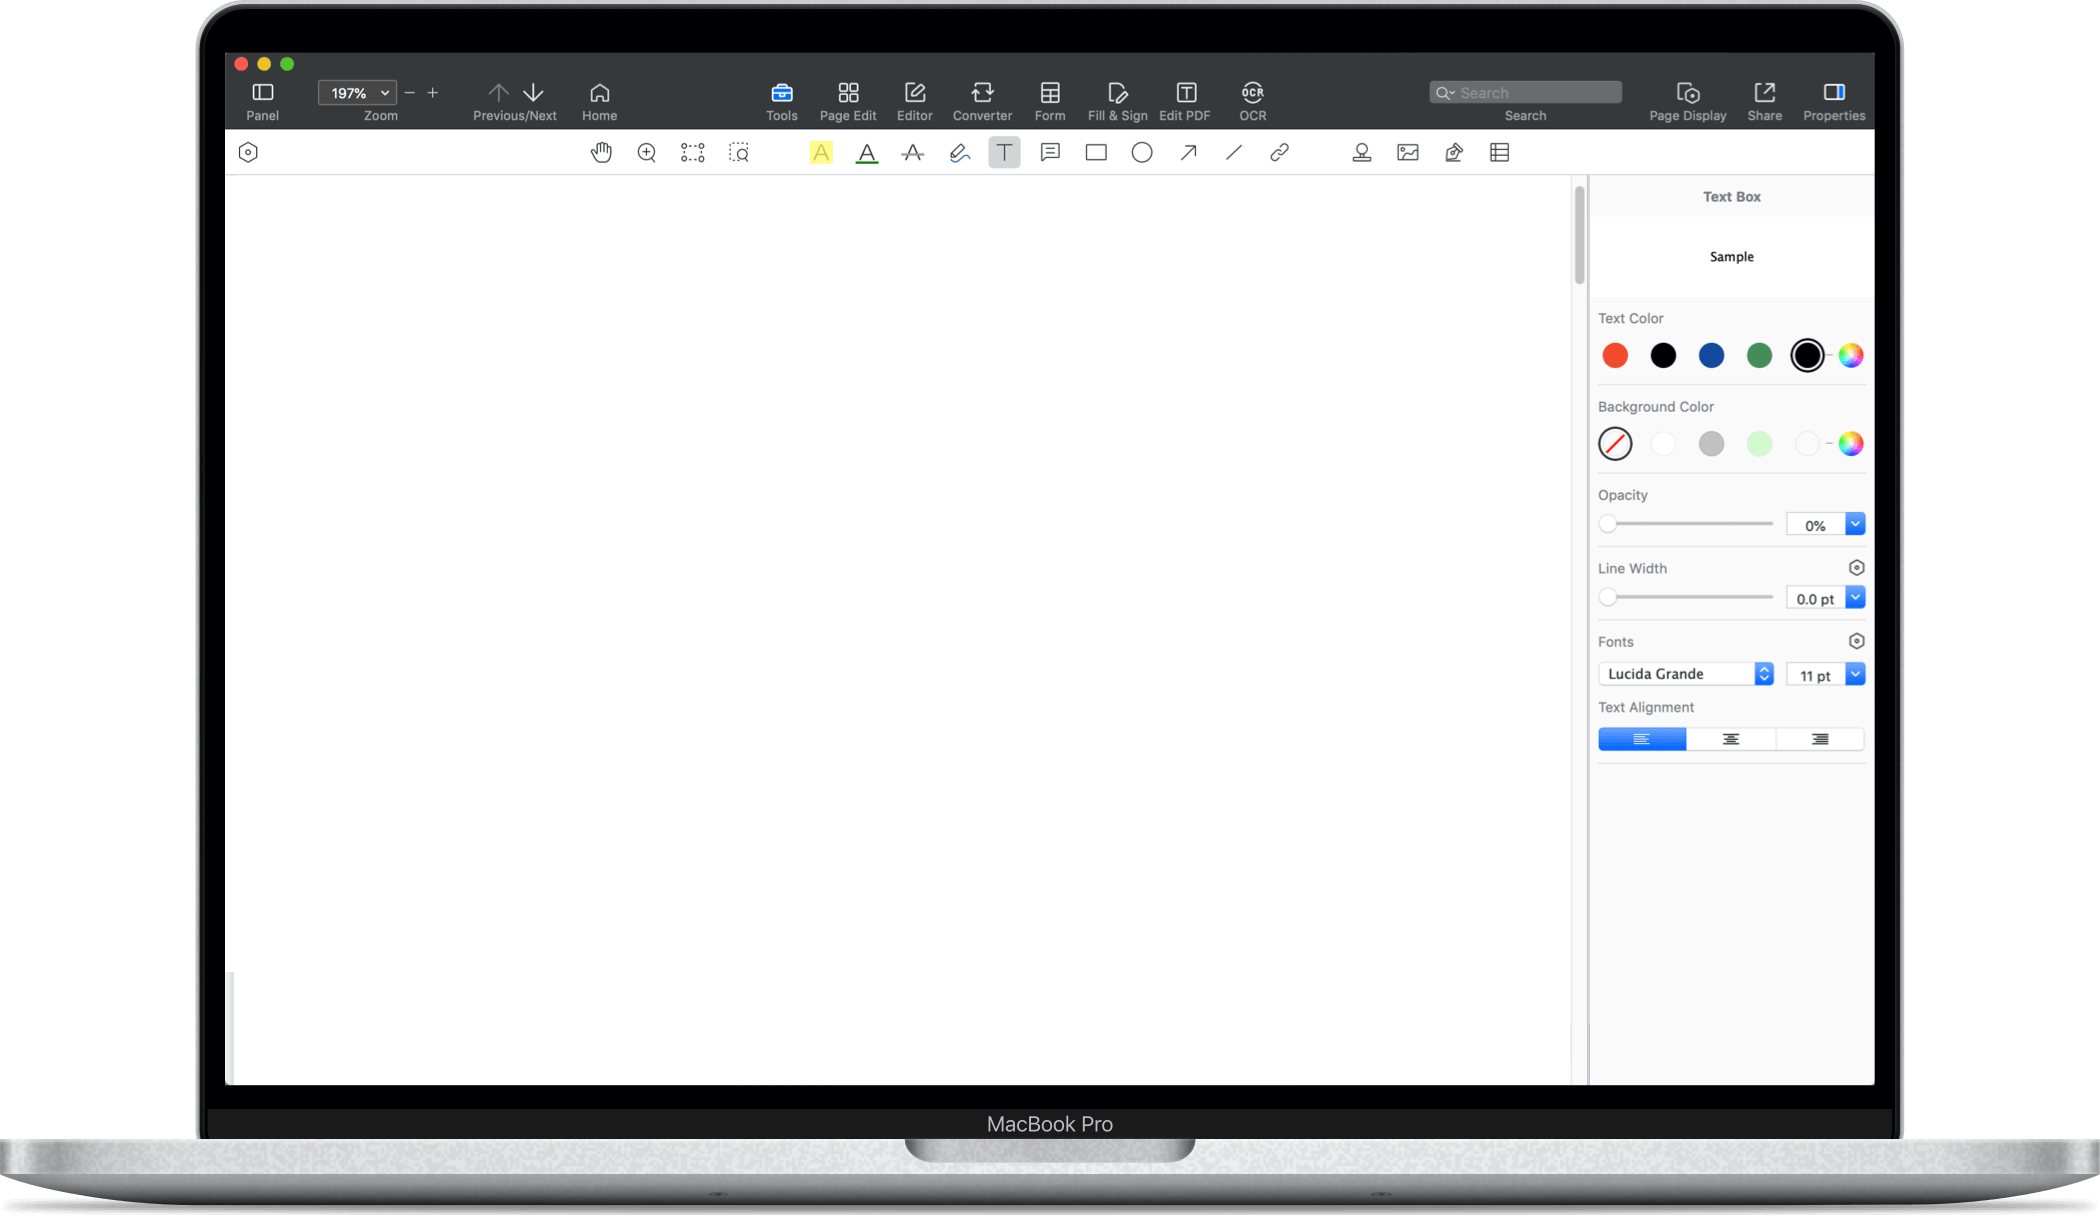
ReaWith PDF Reader Pro, not only can you view and edit PDF documents, but you can also easily customize bookmarks to create unique and stylish designs for your reading experience.
Get Started with PDF Reader Pro Today!
 Free Download
 Free Download
Using powerful editing tools, you can add text, change colors, incorporate graphic elements, and even save your bookmarks in digital format for later printing. PDF Reader Pro simplifies the process of creating bookmarks, giving you complete control over every design detail.


Tips & Tricks


Get Started with LynxPDF Today!