
Products

Admin Console
Self-hosted deployment supported
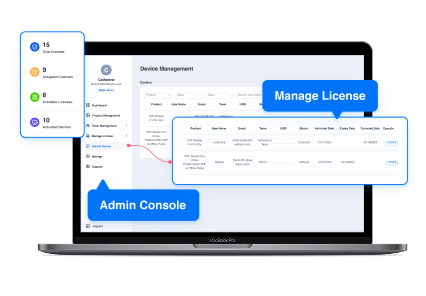
Admin Console
Centralized and flexible license management
Solutions
How to Find Lost Word Documents
Check out our guide on how to find lost Word documents and ensure you never lose another important work or personal document. We've got several methods for doing so in store.

In this comprehensive guide, we'll walk you through various methods to locate and recover your precious Word documents. From retrieving unsaved documents after an unexpected shutdown to finding backup files and resurrecting deleted items from the Recycle Bin, we've got you covered.
We'll also delve into advanced techniques to recover documents after a software crash, ensuring you're equipped to handle almost any document loss scenario.


How to Locate an Unsaved Document
Step 1: Open File Tab
Click the "File" tab in the upper left corner of your Word document.
Step 2: Select Open

Image source: Microsoft Word
Step 3: Select Recover Unsaved Documents

Image source: Microsoft Word
Step 4: Check if your Word file is present in the open folder.
"Before discovering PDF Reader Pro, I was merely grazing the surface of PDF tool capabilities. Now, I've achieved complete command over my documents, experiencing document management on an entirely new level."

Theodore Cipolla
B2B SaaS Content Marketer
Source: LinkedIn
How to Recover a Deleted Word Document
Step 1: Open the Recycle Bin
Access the "Recycle Bin" on your computer's desktop.

Step 2: Search for the Document
Look for the name of your document, its file type, or the date of deletion.
Step 3: Verify Original Location
After finding the file, check its original location (Word restores documents automatically to their original location).
Step 4: Restore the Document
Right-click on your document and click "Restore" to recover the deleted document, which you can find in its original location.

Remember, the Recycle Bin is a great place to find any document or file you may have lost!
"I always used more than one PDF Reader before finding PDF Reader Pro because none of them had all the tools I needed in one platform. Now I only use PDF Reader Pro due to its efficient suite of tools!"

Naaziyah Ismail
B2B SaaS Content Writer
Source: LinkedIn
How to Find Lost Word Documents: Best Practices
Finding lost Word documents can often feel like searching for a needle in a haystack, but with the right practices, it becomes a manageable task.
Here are some best practices for locating unsaved or lost Word documents:
Get Started with PDF Reader Pro Today!
 Free Download
  Free Download
Regularly Checking Temporary Files
Temporary files are key for recovering unsaved documents. Always check your temporary folder, especially following an abrupt closure of the application or a power failure. These files may not be clearly labeled, so it's important to scrutinize file types and their creation dates.
Maximizing the Use of the File Tab and Search Features
Leverage the recovery tools available within Word's File Tab, usually located in the upper left corner of the interface. This section might contain a document recovery tool or a feature for accessing version history. The "Manage Document" option in the File menu is particularly helpful for finding unsaved documents.
Exploring the Search Bar and Search Box
For documents whose exact location is unknown, utilize the search bar in Windows or the search box in Office 365. Input relevant keywords or file types related to your document. This method is especially useful if you recall any part of the document's name or its content.
Checking Backup Files and Previous Versions
If you use backup services, like cloud storage in Office 365, remember to check for any backup files or earlier versions of your documents. These services typically maintain a history of your changes, which can be vital for retrieving lost work.
Knowing Your Recovery Options
Familiarize yourself with various document recovery methods. Whether it's utilizing the unsaved documents feature in the File Tab, exploring temporary file locations, or employing a dedicated document recovery tool, understanding these options can significantly reduce recovery time and stress.
Maintaining Awareness of Original File Locations
Always remember where you originally saved your files. This knowledge is crucial when searching for accidentally deleted files in the Recycle Bin or using a search function.
Using Dialog Boxes Effectively
Pay close attention to dialog boxes that appear after crashes or unexpected shutdowns. They often provide valuable information about recovered files and present options for recovery.
Adhering to these best practices enhances your ability to successfully recover lost or unsaved Word documents. Regular monitoring, effective use of search capabilities, and a good understanding of Word’s recovery features will streamline the recovery process.
By following these best practices, you can increase your chances of successfully recovering lost or unsaved Word documents. Regular checks, efficient use of search functions, and familiarity with Word’s recovery features will make the process much smoother and less daunting.
How to Find Lost Word Documents: FAQ
How Do I Recover Word Documents After a Power Failure?
In the event of a power failure, first check the left panel in Word under 'Recover Unsaved Documents'. Word often autosaves versions of documents, which can be found in this section.
What Should I Do If I Can't Find My Document in the List of Documents?
If the document is not in the list of documents, use File Explorer to search the temporary files directory or the original file location filepath. Look for files with the Word file extension.
Can I Recover Documents That Were Not Manually Saved?
Yes, you can recover unsaved documents. Word typically stores autosaved versions. Check the 'Document Recovery' pane or use the built-in recovery tool in the left navigation pane of Word.
How Can I Locate Backup Copies of My Document Files?
To find backup copies, search your destination folder or any cloud storage services you use, like Google Drive. If you had the backup copy option enabled in Word, check for files with 'Backup of' in their file names in File Explorer.
Are There Advanced Options for Finding Lost Word Documents?
Advanced options include checking the Autosave feature, exploring backup files on external storage devices or mobile devices, and using software like Time Machine on macOS. In Windows, you can also look for earlier versions of the document in File Explorer.
How Do I Use the Navigation Pane to Find Lost Documents?
The navigation pane in Word or in File Explorer can be a handy tool. In Word, it may list autosaved documents in a separate window. In File Explorer, use it to navigate to folder locations where your document might have been saved.
What If My Document Was Lost Due to Application Crashes?
After unexpected crashes, Word usually presents a 'Document Recovery' tool that automatically opens, offering a list of recovered files. You can also manually search for autosaved files in the Word directory or use recovery software that scans for lost files due to user errors.


 How to Create a Proposal Outline Using a PDF TemplateHow to Achieve HIPAA Compliant Document Sharing
Tips & Tricks


Get Started with LynxPDF Today!