
Products
Admin Console
Self-hosted deployment supported
Admin Console
Centralized and flexible license management
Solutions
How to Combine JPG Files Into a Single Document
Follow this comprehensive guide to master how to combine JPG files into a single document using one of our recommended PDF editors.

Use one of the recommended PDF editors in this guide to learn how to combine JPG files into a single document.
See our other tutorials, such as how to convert text to PDF, to learn how to conduct more types of conversions.


Top PDF Editors to Combine JPG Files
See the features of each of our recommended PDF editors to see which platform and pricing tier works best for your needs.
| Tool | Advantages | Limitations |
| PDF Reader Pro (Mac, Windows, iOS) |
✅ Batch import multiple JPGs ✅ Rearrange image order ✅ Customize page size and orientation ✅ Save directly as PDF ✅ Works offline ✅ Subscription can be used on desktop and mobile |
Provide free version and 7-day free trial for full version |
| ComPDF Web Demo (Online) |
✅ Free and fast online access ✅ Simple drag-and-drop interface ✅ No install required ✅ Combines files quickly |
Require internet |
| Mac Preview (Built-in Mac) |
✅ No extra software needed ✅ Combine JPGs via "Print to PDF" ✅ Works offline |
* Manual and less intuitive for large batches * Fewer customization options * No OCR for scanned images |
| Microsoft Print to PDF (Windows) |
✅ Built-in on Windows 10/11 ✅ No software install needed ✅ Works offline via file explorer or Photos app |
* No preview/edit options * Must manually arrange files before printing |
How to Combine JPG Files Step by Step
Follow the steps below to see how to use PDF Reader Pro’s desktop tools for Windows and Mac, plus further options for Mac, Windows, and mobile devices.
Check out our blog about how to convert JPG to PDF if you need further information.
Using PDF Reader Pro (Windows, Mac, iOS and Android)
Step 1: Download PDF Reader Pro
You can download the latest version of this software for Mac or Windows here, or have a look at our iOS or Android options:
Get Started with PDF Reader Pro Today!
 Free Download
  Free Download
Step 2: Locate the “Image to PDF” Tool on the Home Interface
Upload your images from your document library.
Step 3: Choose Your Output
Click on the option to turn the images into a “New PDF Document”. To create one file, you should select “Merge All”.
Step 4: Click “Save as PDF”
Your original JPG files are now combined!
Using ComPDF Web Demo (Online Tools)
Before you get started, convert your JPGs to PDF.
Step 1: Locate Your Files in Your Document Library
Right-click on the file and choose “Create PDF”.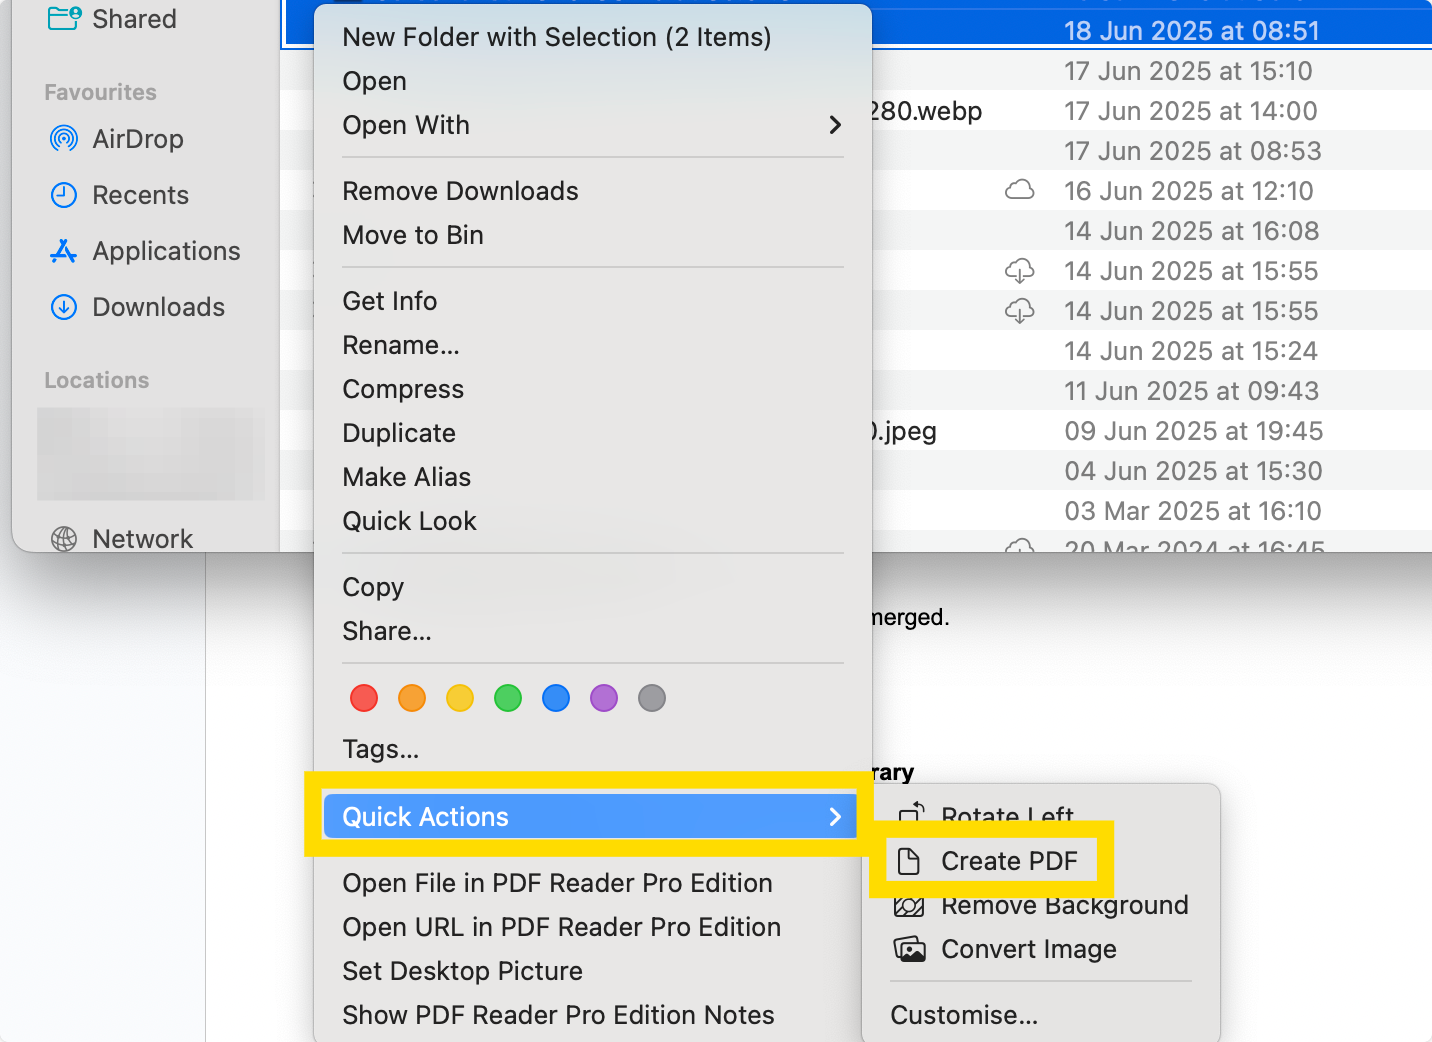
Step 2: Open ComPDF Web Demo
Choose “Document Editor” from the main menu.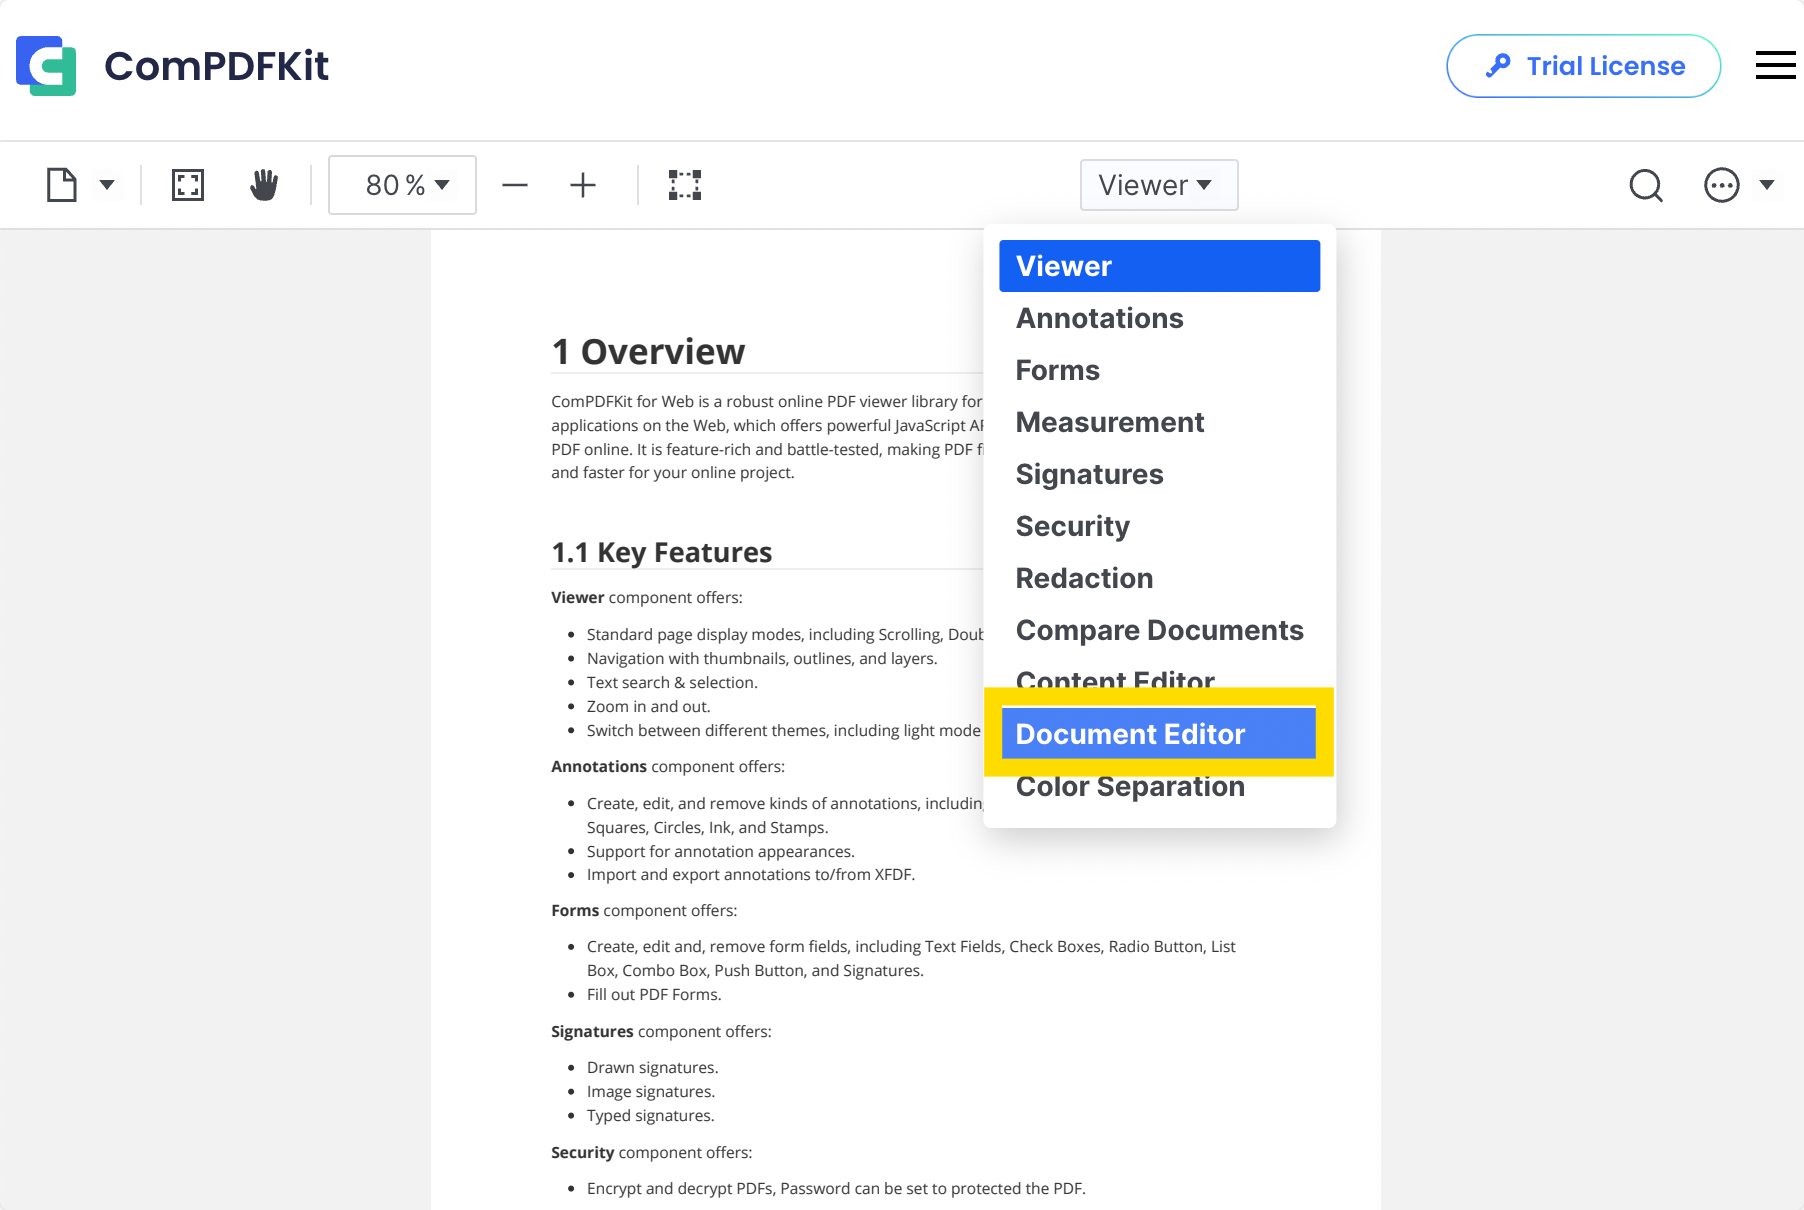
Step 3: Click on the “Insert” Icon
Add your two PDF documents from your document library.
Step 4: Save Your Document
This will produce a single PDF with both images merged.
Using Mac Preview
Step 1: Select the JPGs in Your Document Library
Right-click on these and choose “Quick Actions”.
Step 2: Select “Create PDF”
Preview your document to see if the order is correct.
Using Microsoft Print to PDF
Step 1: Highlight Your JPGs in Your File Library
Right-click on these files.
Step 2: Choose “Print”
In the window, select “Print to PDF” as the destination and click “Print”.
Top Tips for Combining JPG Files from Experts
Here are some top tips curated from industry best practices:
- Resize all JPGs to a uniform width (e.g., 1080px) before combining
- Rename as 01.jpg, 02.jpg, etc., to maintain the desired sequence in the final PDF.
- Use software that supports drag-and-drop or batch file selection (e.g., PDF Reader Pro
- Use the thumbnail preview pane in your PDF editor to scan for problems before saving.
- Use “optimize PDF” or “reduce file size” features after combining, or compress images before importing.
Did you find this blog helpful? We have weekly PDF tutorials available as well as a varied template library for you to make use of.


 How PDF Reader Pro Helps Freelance Designers Review Contracts and Collaborate ProfessionallyIntroducing LynxPDF's SSO Feature for Mac
Tips & Tricks


Get Started with LynxPDF Today!